The Right Sidebar
You can toggle the right sidebar by clicking the vertical ellipsis next to the sidebar. After selecting an object the right sidebar will be populated with information and form elements related to the object.
General
The first thing in the right sidebar is always the name of the object. Click on the name to edit it.
If the object can be deleted you will see a delete button at the bottom of the sidebar.
Basic transforms
Meshes and object3Ds can be moved around, rotated, and scaled by editing values in the right sidebar. Alternatively you can turn on the transform controls widget by clicking the icons shown here.
![]()
The size/scale section can be used to grow or shrink objects. The size tab gives you precise control of the object's dimensions. Change to the scale tab if you would prefer using a slider to set the size of the object.
Note: The size tab is disabled for animated objects since the dimensions of an animated object vary over time.
Editing Meshes
You can change the selected mesh's material to any other material by clicking on the material dropdown and selecting a different material.
Editing Materials

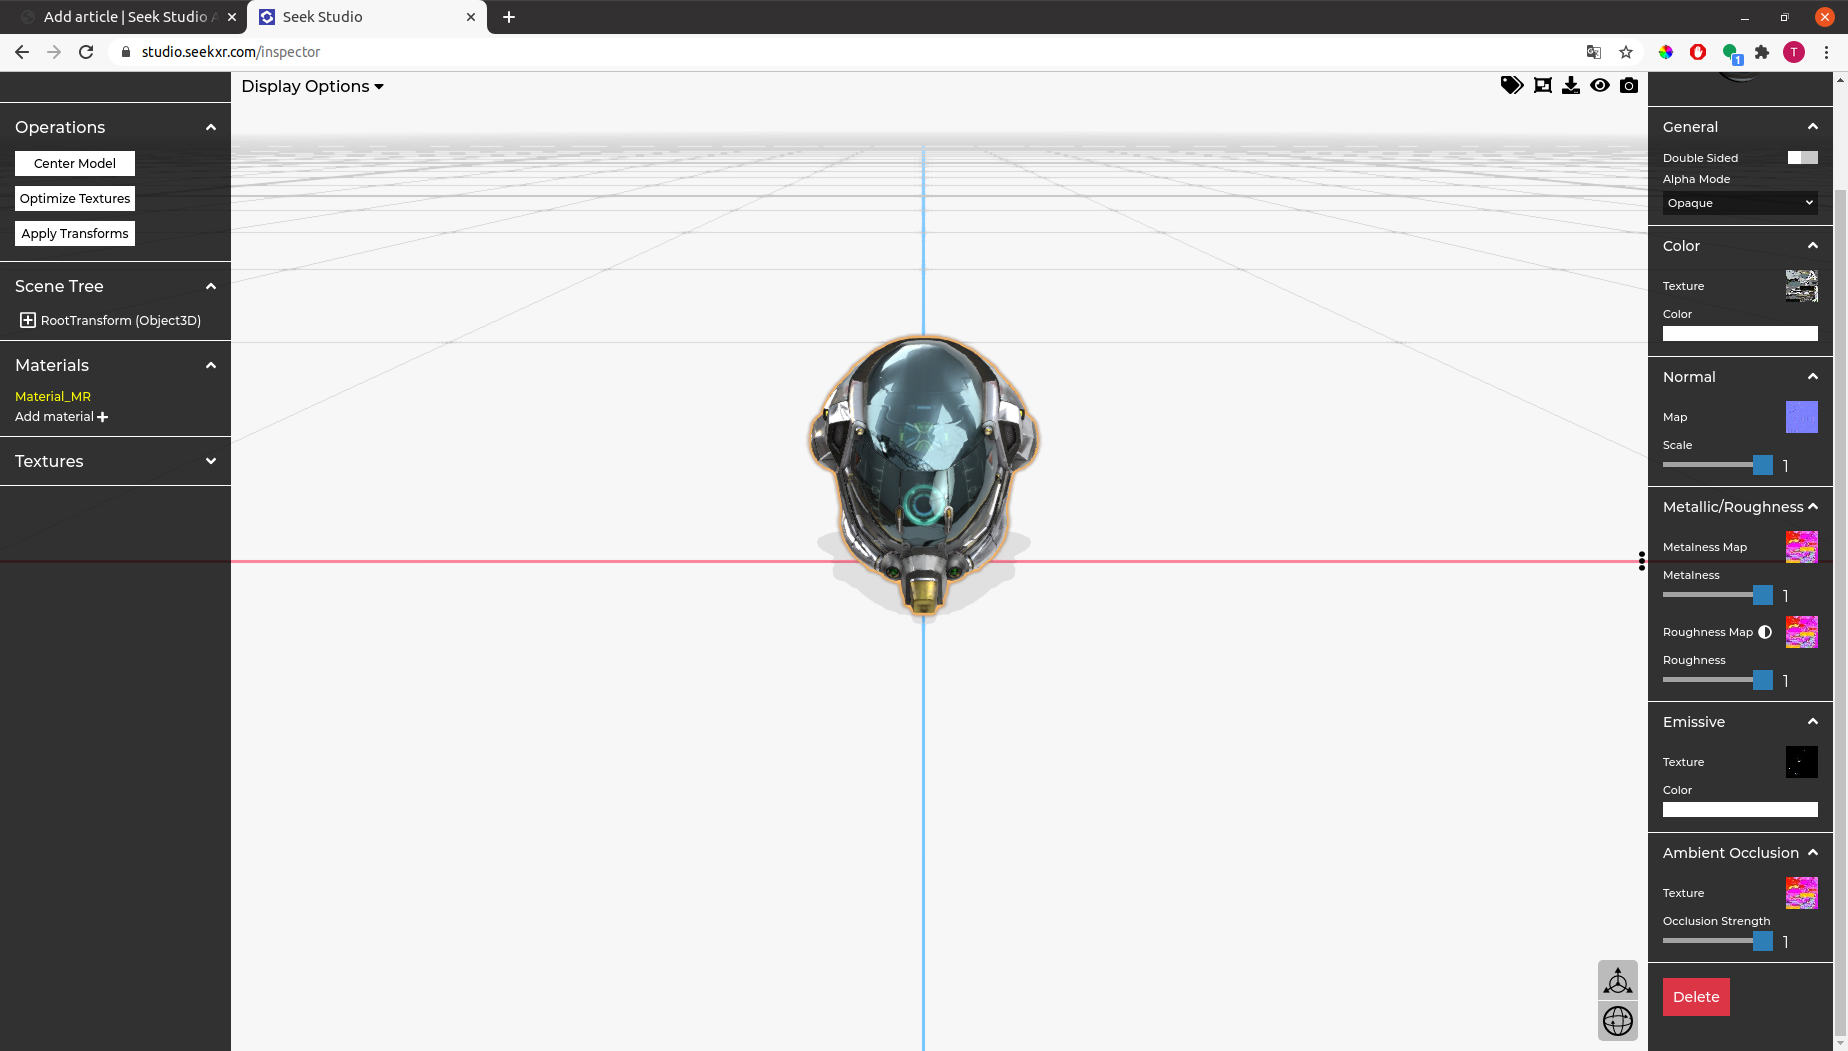
The edit materials screen is divided into multiple sections. Near the top we added a reference sphere. Changes you make to any of the sections will be reflected in the sphere and in the model.

General
In the general section you will find an on/off switch for making the material double sided and options for opacity and transparency behavior (alpha mode).
Color
In the color section you can set the diffuse texture or change the base color of the material. If you want the diffuse texture to be the only thing affecting the material's color set the base color to pure white.
Normal
Normal here refers to the material's normal map. You can add a new map or change the normal map by clicking on the texture icon. You can stretch the normal map over the material's surface using the scale slider.
Roughness/Metalness
Roughness and metalness together determine how light is scattered by the material. If you set the roughness to 0 and the metalness to maximum the material will be highly reflective. Maximum roughness and 0 metalness produces a dull surface. The texture slots are for the roughness and metalness maps. In the same way that you can use an image to map colors to areas on a mesh you can use images to map metalness and roughness values to different parts of the mesh.
Note: Only the green channel of the roughness map is used in determining the roughness value. Similarly, only the blue channel of the metalness map is used in determining the metalness value.
You can click on the texture icon (a small preview of the map or an empty box with a plus symbol) to select the map. The edit map screen includes a 'Show relevant channel' switch for roughness, metalness, and ambient occlusion maps so you can see the distribution of the relevant color.

Since the roughness and metalness maps use different color channels they can be merged into a single image. In fact if they are not the same image the inspector will encourage you to merge them.
Click the half moon icon next to the words 'Roughness Map' to invert the green channel of the roughness map (areas that were less rough will become more rough and vice versa).
Emissive
Use the emissive section to add illumination or glow to the material. If the material should not radiate light remove the emissive texture, if any, and set the emissive color to pure black.
Ambient Occlusion
As it states in the Wikipedia article on ambient occlusion, "In 3D computer graphics, modeling, and animation, ambient occlusion is a shading and rendering technique used to calculate how exposed each point in a scene is to ambient lighting."
In this section there is a texture slot for an ambient occlusion map and a slider for the ambient occlusion intensity (or strength). If the effect of the ambient occlusion map is too pronounced try reducing the occlusion strength.
Note: Only the red channel of the ambient occlusion map is used in determining the occlusion amount. This means that the roughness, metalness, and ambient occlusion maps can all use the same image.
Editing Textures

'References' is the number of texture slots that are currently using the selected texture.
Next to the texture size there is a small download icon that you can click to export a full size version of the texture image to your computer.
You can toggle the format of the texture image between PNG and Jpeg. If the image is fully opaque it is usually better to use Jpeg. If Jpeg is selected an extra form element will appear for the image quality. The default quality is 0.92. Reduce the quality to generate smaller files.
Click on the texture preview or placeholder to select an image from your local files.
The resolution dropdown allows you to shrink the texture image in order to reduce the overall filesize of the exported model.
At the bottom of the edit texture screen is a 'Used by' section which contains a list all the materials that are using the selected texture. Clicking on a material in this list will select the material for editing.